How to Install WordPress with Nginx on Ubuntu 12.04
- nginx
- php
- wordpress
- linux
- ubuntu
About
WordPress is an open source, PHP based blog and content management system(CMS) made to streamline the process of getting your website up and looking pretty. The WordPress community makes a multitude of plugins (over 30,000) that extend the functionality to make it work just the way you like. There is also an enormous support community to help with any issues.
Nginx(pronounced "engine-x") is a popular light-weight server alternative to Apache. It is considered leaner and meaner than Apache because it uses an event-driven system that chomps through requests rather than spinning up separate processes and threads for each request.
Prerequisites:
- User with root privileges
- Linux, Nginx, MySQL, PHP (LEMP) stack
Download WordPress
- Download the zipped package(archive file) directly from the WordPress website:
wget https://wordpress.org/latest.tar.gz - Unzip/Extract the files from the package:
tar -xvzf latest.tar.gz - Create the
/var/wwwdirectory. The-pflag will create the directory only if it doesn't exist already:sudo mkdir -p /var/www- NOTE: Instead of creating and using the
/var/wwwdirectory, you can use/usr/share/nginx/wwwinstead. Make sure to adjust all of the commands and configs if you do.
- NOTE: Instead of creating and using the
- Add permissions to the Nginx user(
www-data) to the directory we just created:sudo chown -R www-data:www-data /var/www - Now let's also add your username to the
www-datagroup:sudo usermod -a -G www-data yourusername(replace "yourusername" with your username) - Copy the WordPress files we just extracted into the
/var/www/directory:sudo cp -r ~/wordpress/* /var/www- Don't worry, the files are not public yet. We will change this in the Nginx server block. - Now we can clean up a bit. Delete the zip archive:
rm latest.tar.gz - Delete the folder we extracted:
rm -r wordpress/
Create the Database and User
- Start the MySQL shell and login:
mysql -u root -p- You should see
mysql>on the left now.Query OK [...]will appear after you enter each of the following commands.
- You should see
- Create a new database to store all wordpress content(articles, settings, etc). I am calling my database "wordpress" to keep things simple:
CREATE DATABASE wordpress; - Now we need to create a user which WordPress will use to set and retrieve content:
CREATE USER 'wordpressuser'@'localhost' IDENTIFIED BY 'password'; - If you need to change the password of the user, you can just run this command:
SET PASSWORD FOR 'wordpressuser'@'localhost' = PASSWORD('password'); - Give your wordpress user all permissions for the database we just created:
GRANT ALL PRIVILEGES ON wordpress.* TO 'wordpressuser'@'localhost' IDENTIFIED BY 'password'; - Now that you have set up some new privileges, reload these settings:
FLUSH PRIVILEGES; - Exit the MySQL shell:
exit;
Create a Nginx Server Block
- Create a new Nginx server block file:
sudo nano /etc/nginx/sites-available/wordpress - Paste the following snippet into the new file (explanation below)
- Find
server_name example.com;and change it to your domain nameexample.com. If you don't have a domain, you can use your server IP address. listenis the port we check for web requests onrootis the base folder where we have contentindexis the auto-complete file when nothing is in the url(ex.http://example.com/)server_nameyour domain or IPlocation / { ... }is the block that allows the Wordpress permalinks to worklocation ~ \.php$ { ... }is the block that passes any.phprequest to the PHP
server { listen 80; root /var/www; index index.php index.html index.htm; server_name example.com; location / { # First attempt to serve request as file, then # as directory, then fall back to index.html try_files $uri $uri/ /index.php; } # pass the PHP scripts to FastCGI server listening on 127.0.0.1:9000 location ~ \.php$ { # NOTE: You should have "cgi.fix_pathinfo = 0;" in php.ini try_files $uri =404; # With php5-fpm: fastcgi_pass unix:/var/run/php5-fpm.sock; fastcgi_index index.php; fastcgi_param SCRIPT_FILENAME $document_root$fastcgi_script_name; include fastcgi_params; } } - Find
- Save and Exit. Press
Ctrl+xto exit. Pressyto confirm and thenenterto finally save. - Enable the server block by creating a link between the configuration and the enabled directories:
sudo ln -s /etc/nginx/sites-available/wordpress /etc/nginx/sites-enabled/wordpress - Remove the default server block from the enabled directory:
sudo rm /etc/nginx/sites-enabled/default - Now reload the Nginx service:
sudo service nginx restart
Setup WordPress
Now when you visit your site either by IP or domain it should show a "There doesn't seem to be a wp-config.php file." dialog like the one below:
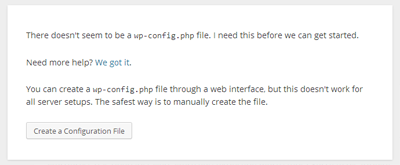
Press the Create a Configuration File button and the Let's go! button on the following page. Now you should see a form that asks for the database info. Fill it out appropriately with the credentials you set up, then press submit.

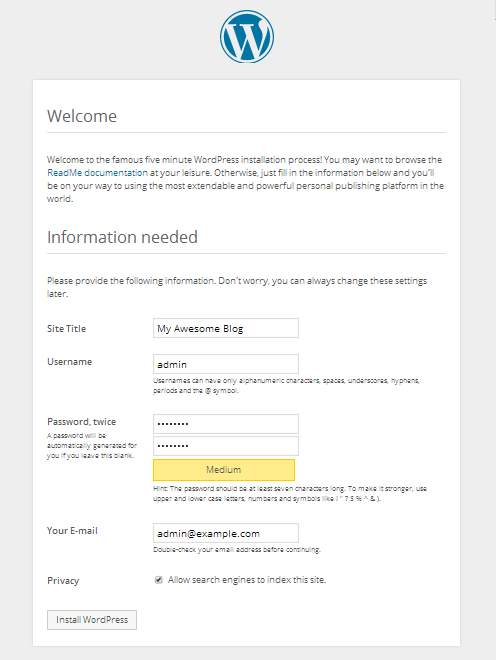
Press the Run the install button on the following page.
Now enter in your site title and admin account info and press the Install WordPress button. The page should look like this.
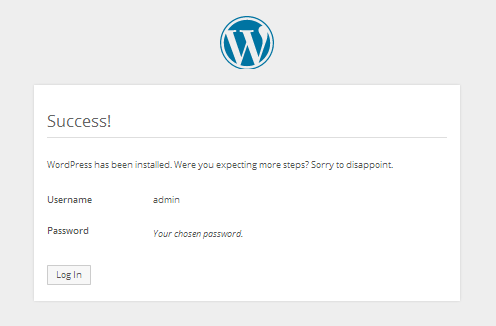
Success!
It should present you with a "Success!" screen and you should be able to login to the admin panel and visit the main site now.
(Optional) Enable Permalinks
Login to the WordPress admin interface.
In the left-hand menu go to Settings -> Permalinks. Change the radio button setting to your needs(I usually use "Month and name"). Then click Save Changes.
(Optional) Install W3 Total Cache
W3 Total Cache(W3TC) is a quick and easy way to speed up your site by utilizing the power of caching and minification.
I suggest running Google's PageSpeed Insight test before and after you install to see the improvement.
NOTE: This plugin will cache your files making it a little bit difficult to make theme changes. All you have to do is Purge the cache every time you make a modification.
Login to the WordPress admin interface.
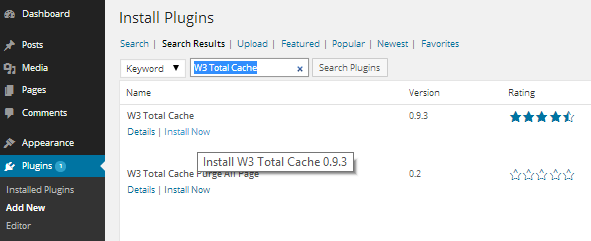
In the left-hand menu go to Plugins -> Add New. Type W3 Total Cache in the search.
Click the Install Now link.
If WordPress is asking for your FTP credentials, this means it can't access the files directly. To fix this, just change the wordpress file owner to the www-data user and group
sudo chown -R www-data:www-data /var/www
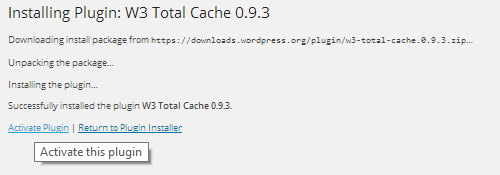
Click the Activate Plugin link(screenshot) after it installs.
Click the W3TC Settings link or in the left-hand menu go to Performance -> General Settings.
- Leave the "Toggle All" radio unchecked
- Enable
Page cache. Cache pages for faster loading and more efficient delivery. - Enable
Minify. Shrink and combine JS and CSS files for faster loading and more efficient delivery. - Enable
Object Cache. Speed up generation of content by WordPress. - Enable
Browser Cache. Properly tags content so that browser clients minimize downloads of pages (file header stuff).
If you are getting an error(something about the file length 150, etc) with the Minify function: Visit http://example.com/wp-admin/admin.php?page=w3tc_minify#advanced and check the Disable minify automatic file name length test option. The Filename length should be 150. Disable Minify, save, then re-enable it.
You need to include the W3TC nginx.conf file generated in the root of your wordpress install to the wordpress nginx server block. Add this to bottom of the server block below the php location block.
/etc/nginx/sites-available/wordpress
server {
  [...]

  # For W3 Total Cache(W3TC)
  include /var/www/nginx.conf;
}Save(Ctrl+x) and restart nginx: sudo service nginx restart
There is a lot more you can do with W3 Total Cache but those are just the easy click and done settings. To further utilize this plugin, you could get a CDN to host all of your static files, or even add in the CloudFlare integration.
Want even more?
You could even install Varnish. Varnish is a web app accelerator that stores a copy of a page and serves it immediately when a request comes in rather than having Nginx and WordPress rebuild the page on every request. This will act as another layer of caching on top of W3 Total Cache.
In the W3 Total Cache settings under the Reverse Proxy category make sure to add 127.0.0.1 to the Varnish Servers textarea. This will allow W3 Total Cache to purge the Varnish cache.
Common Commands:
| Command | Description |
|---|---|
sudo service nginx restart | Restart the Nginx process |
sudo nano /etc/nginx/sites-available/wordpress | Edit the Nginx server block we made for WordPress |