Facedancer21 Getting Started in Windows
- facedancer
- goodfet
- usb
This guide will go over compiling the firmware, flashing it to your device, and emulating your first USB device. I was successful using Windows 8(not 8.1) but it still came with challenges. Hopefully this guide can steer you clear of any head-banging issues.
If you need help making/assembling your own Facedancer board, follow this guide I made previously.
Getting started
Inspect your board for any solder bridges, cold joints, etc. Use a multimeter in continuity mode to test. This is important as you are connecting this to your precious pc.
Plug in the host side to your pc via USB 2.0. I ran into Blue Screen issues on Windows 8 using USB 3.0.
If you want to be cautious, plug it in on an old PC first and see if it enumerates without issue. You could even use a USB Isolator like this(I use one).
You should see the Rx and Tx LEDs blink a bit. It should automatically start finding drivers. When it is done, in Device Manager, you should have USB Serial Converter under the Universal Serial Bus controllers category and a USB Serial Port(COMx) under Ports (COM & LPT) category.
Getting the code
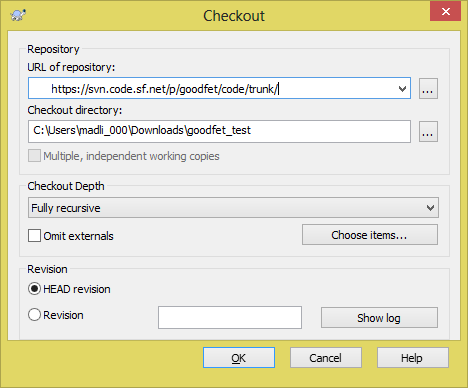
All of the firmware is available in the goodfet svn repo. To download the repo, download and install TortoiseSVN. Now create a folder where you want to store the svn(avoid spaces in the path). I chose Downloads/goodfet_svn. TortoiseSVN is a shell extension so that means it adds entries to your right-click context menu. Right click the folder you just created and click SVN Checkout...  . In the URL field enter:
 https://svn.code.sf.net/p/goodfet/code/trunk/ and press OK. All of the files should download and you will get a green checkmark on all the files and directories.

The client folder refers to more of the host-side stuff. The firmware folder applies to the stuff you program into your device.
After you got it all downloaded you need to add the client directory to your path environment variable. ex: C:\Users\madli_000\Downloads\goodfet_svn\client;
Note: You will need to exit your console(cmd prompt) every time you update an environment variable for them to take effect. To set or modify an environment variable, you can use setx somekey somevalue in cmd prompt. Or go to control panel: Control Panel -> System and Security -> System -> Advanced System Settings -> Environment Variables. If you are adding directories to the path variable, just separate them with a semicolon(;).
Compiling the Code
If you just want a pre-compiled hex file (not sure how up to date it is), you can just download from the project dist/ directory. Otherwise, you'll need to compile it yourself using the steps below:
- Install 32-bit Python 2.7.x. Add python to your
pathenvironment variable; ex.C:\Python27_32bit\;C:\Python27_32bit\Scripts;. If you don't add it to your path you will have to call python via its full path every time like"C:\Python27_32bit\python.exe". - Install pyserial by running this command
pip install pyserial. If you need thepipcommand: Use these Windows binaries and first installsetuptools. Then installpip. If you didn't add python to your path in the previous step you will have to use pip's full path like:"C:\Python27_32bit\Scripts\pip.exe" install pyserial - Install MinGW. Add it to your
pathenvironment variable; ex.C:\MinGW\bin - Download the mspgcc zip. Create a
3rd_partyfolder inside your MinGW installation (C:\MinGW\3rd_party). Copy the mspgcc zip into this folder. Now unzip it. Add the bin folder inside where you unzipped to yourpathenvironment variable; ex.C:\MinGW\3rd_party\mspgcc-20120406-p20120911\bin - Install GOW: lightweight alternative to Cygwin. It should be already added to your
pathbut just check to make sure; ex.C:\Program Files (x86)\Gow\bin - Add the environment variable
boardwith the value offacedancer21. cdto thefirmwarefolder in the svn(ex.cd "C:\Users\madli_000\Downloads\goodfet_svn\firmware").- Run
make clean installin cmd prompt. This will probably error out(like the message below) but do not worry. you still generated/compiled thegoodfet.hexfile we need.make (e=2): The system cannot find the file specified. make: *** [install] Error 2
Flashing the code
It is important to understand the COMX, ttySX, port X relationship. Simply put, ttySX and port X are zero indexed so they will be one less than COMX. ex. COM7=ttyS6=port 6
Flash the firmware to your Facedancer board:
"C:\Python27_32bit\python.exe" "C:\Users\madli_000\Downloads\goodfet_svn\client\goodfet.bsl" --comport=6 --speed=38400 --debug -e -p "C:\Users\madli_000\Downloads\goodfet_svn\firmware\goodfet.hex"OR if you added python to your path and are in the client directory, it can be simplified to:
python goodfet.bsl --comport=6 --speed=38400 --debug -e -p "../firmware/goodfet.hex"A lot of stuff should scroll in your cmd prompt. When it is done it should say: 5374 bytes programmed. You can see the full output of this being successful with DEBUG=3 in goodfet.bsl in this pastebin.
You can run "C:\Python27_32bit\python.exe" goodfet.bsl -h to find out what all those parameters mean.
Emulating your first USB Device (Communicating through the TARGET port)
Now that your board is all set up, it is time to get into the action.
Plug in another cable in the TARGET end and into another PC or your own(haven't tried).
In the client svn directory, run python goodfet.maxusbhid in cmd prompt.
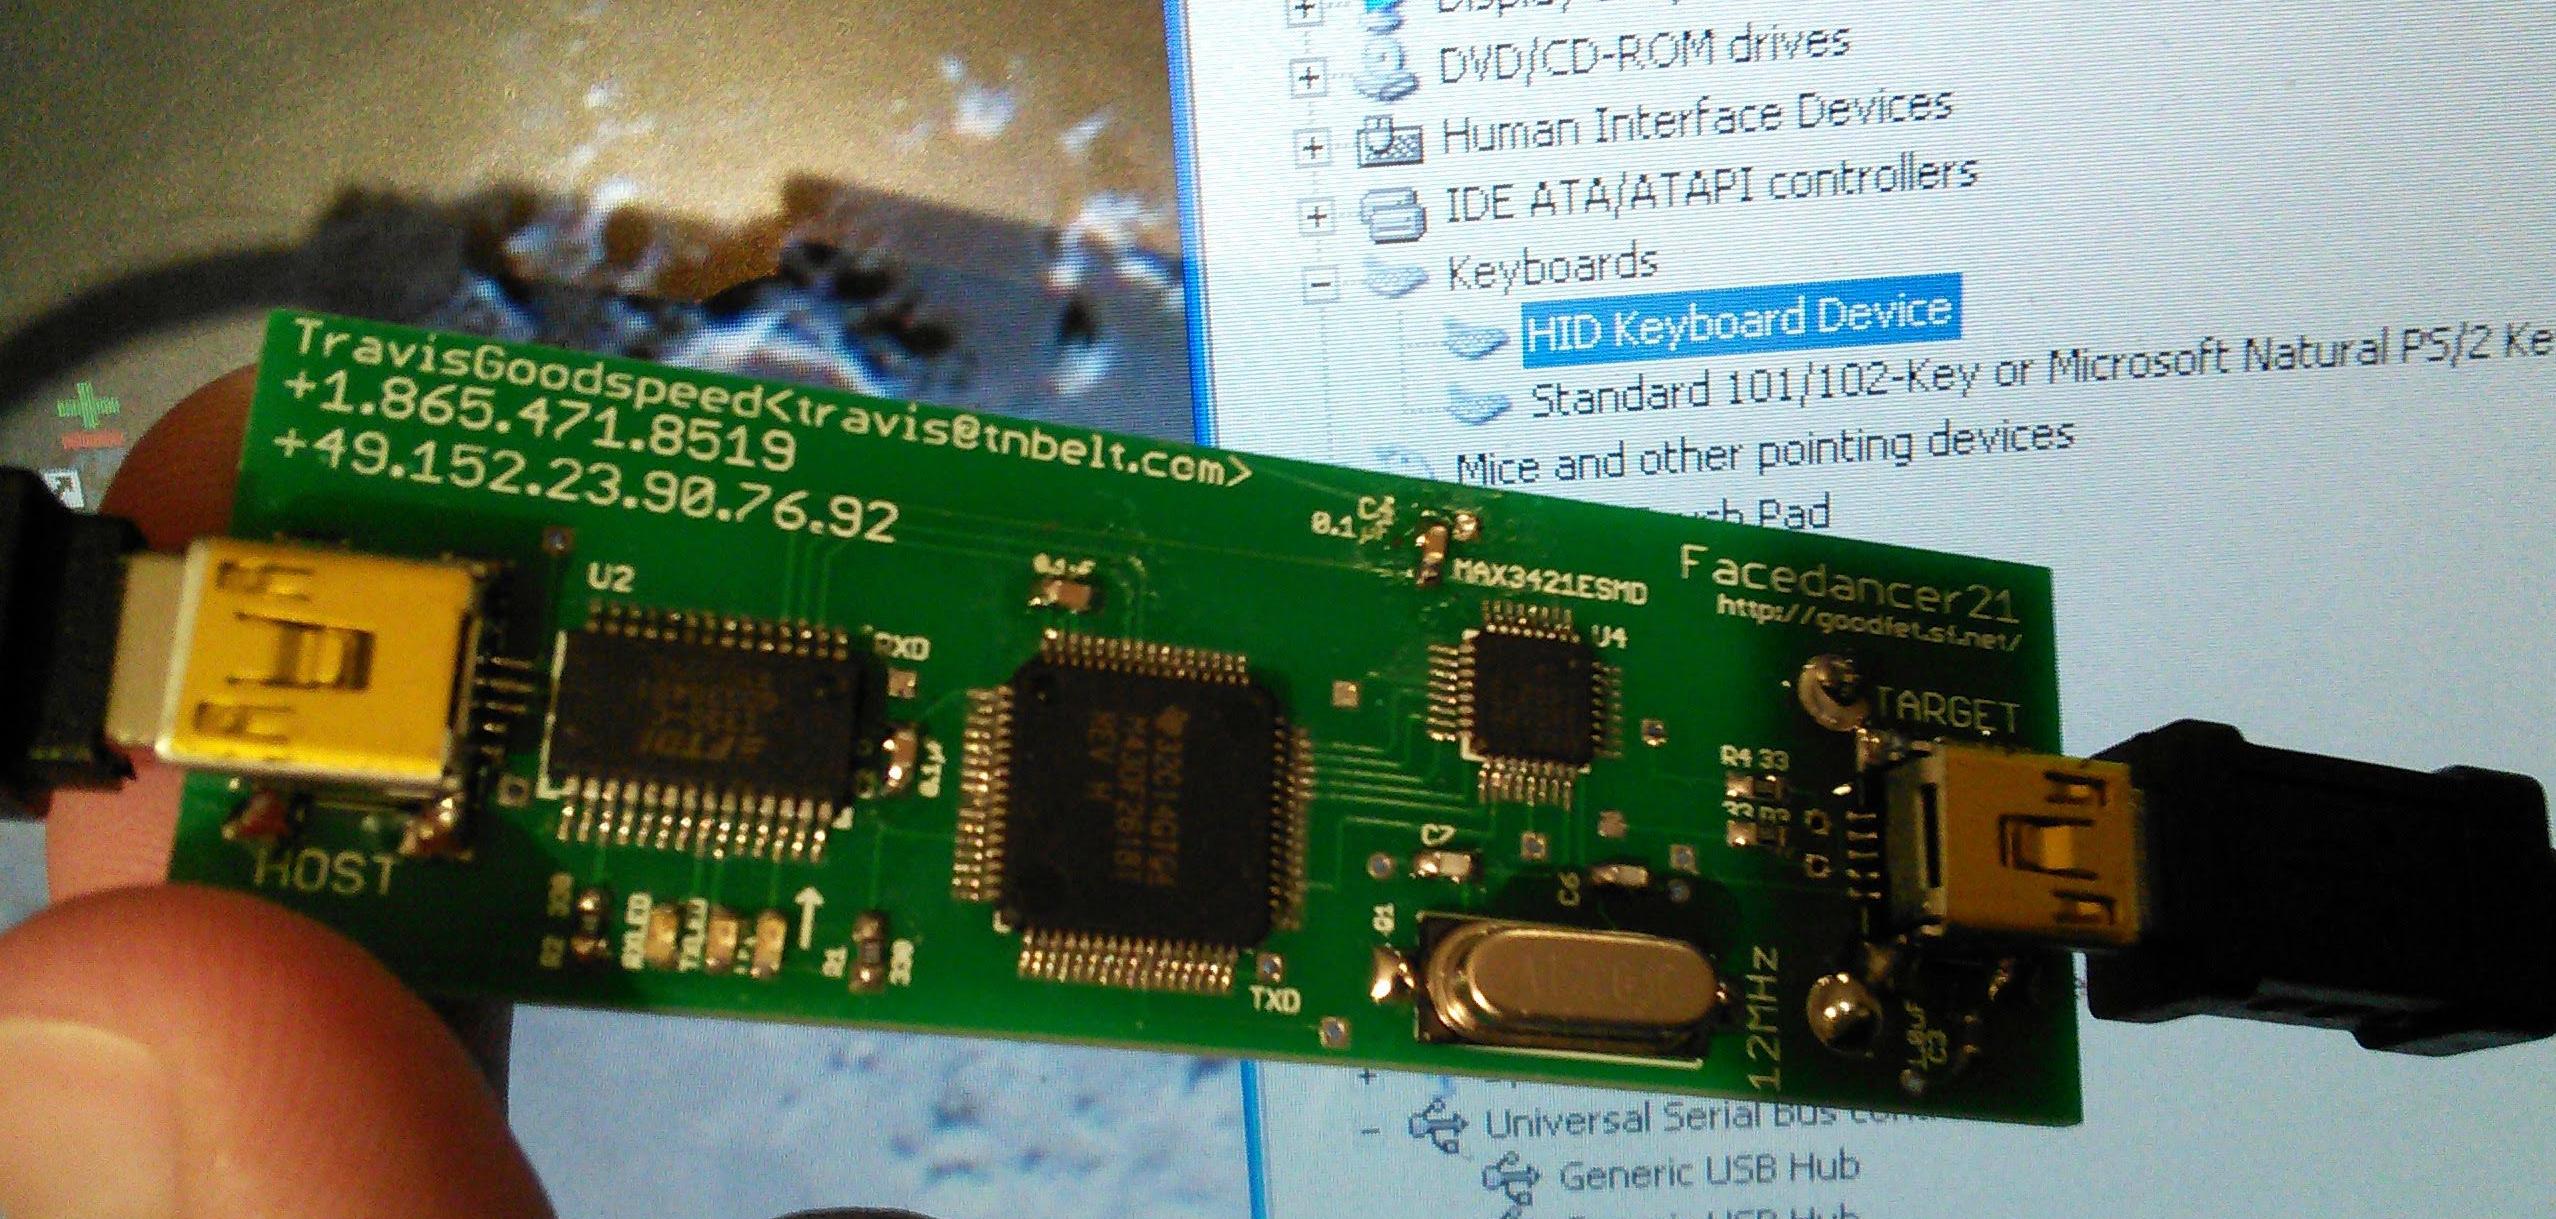
You should see the lights start to blink pretty solid. On the second PC, in Device Manager you should see HID Keyboard Device under the keyboards category.
Here is the full console output of running that command.
C:\Users\madli_000\Downloads\goodfet_svn\client>"C:\Python27_32bit\python.exe" goodfet.maxusbhid
C:\Users\madli_000\Downloads\goodfet_svn\client\GoodFETMAXUSB.py:15: UserWarning: This library will soon be deprecated in favor of the USB*.py libraries.
  """This library will soon be deprecated in favor of the USB*.py libraries."""
goodfet.maxusbhid:16: UserWarning: The libraries upon which this program depends will soon be deprecated in
favor of the USB*.py libraries.  See facedancer-keyboard.py for an example of
this program written using the new libraries.
  this program written using the new libraries."""
port: None
port: None
port: COM7
Connected to MAX342x Rev. 13
Starting a HID device.  This won't return.
Handling a setup packet of bmRequestType=0x80, bRequest=0x06, wValue=0x0100, wIndex=0x0000, wLength=0x0040
Handling a setup packet of bmRequestType=0x00, bRequest=0x05, wValue=0x0001, wIndex=0x0000, wLength=0x0000
Handling a setup packet of bmRequestType=0x80, bRequest=0x06, wValue=0x0100, wIndex=0x0000, wLength=0x0012
Handling a setup packet of bmRequestType=0x80, bRequest=0x06, wValue=0x0200, wIndex=0x0000, wLength=0x0009
Handling a setup packet of bmRequestType=0x80, bRequest=0x06, wValue=0x0300, wIndex=0x0000, wLength=0x00ff
Handling a setup packet of bmRequestType=0x80, bRequest=0x06, wValue=0x0303, wIndex=0x0409, wLength=0x00ff
Handling a setup packet of bmRequestType=0x80, bRequest=0x06, wValue=0x0200, wIndex=0x0000, wLength=0x00ff
Handling a setup packet of bmRequestType=0x80, bRequest=0x06, wValue=0x0300, wIndex=0x0000, wLength=0x00ff
Handling a setup packet of bmRequestType=0x80, bRequest=0x06, wValue=0x0302, wIndex=0x0409, wLength=0x00ff
Handling a setup packet of bmRequestType=0x80, bRequest=0x06, wValue=0x0300, wIndex=0x0000, wLength=0x00ff
Handling a setup packet of bmRequestType=0x80, bRequest=0x06, wValue=0x0302, wIndex=0x0409, wLength=0x00ff
Handling a setup packet of bmRequestType=0x80, bRequest=0x06, wValue=0x0100, wIndex=0x0000, wLength=0x0012
Handling a setup packet of bmRequestType=0x80, bRequest=0x06, wValue=0x0200, wIndex=0x0000, wLength=0x0009
Handling a setup packet of bmRequestType=0x80, bRequest=0x06, wValue=0x0200, wIndex=0x0000, wLength=0x0022
Handling a setup packet of bmRequestType=0x00, bRequest=0x09, wValue=0x0001, wIndex=0x0000, wLength=0x0000
Handling a setup packet of bmRequestType=0x21, bRequest=0x0a, wValue=0x0000, wIndex=0x0000, wLength=0x0000
Stalling a class request.
Stalling EPO for bmRequestType=0x21, bRequest=0x0a, wValue=0x0000, wIndex=0x0000, wLength=0x0000
Handling a setup packet of bmRequestType=0x81, bRequest=0x06, wValue=0x2200, wIndex=0x0000, wLength=0x006b
Running into issues?
This guide is mostly from my memory as I didn't want to uninstall everything just to try to step back through it. If you running into an issue, try these things below and then contact me and tell me what I forgot.
- Try Cygwin. I couldn't get it to program but maybe you will be successful. You will need the
devel/makeand thepythonpackage. - If using Cygwin, try adding the environment variable
CYGWINwith the value ofreset_com. See this documentation for more details. - Try setting the environment variable
GOODFETtottyS6or6. This is sometimes used in some of the scripts if it can't find a port.
Command cheat sheet
| Command | Description |
|---|---|
make clean install | Same as make clean and make install. Use in the firmware svn directory to compile and create the goodfet.hex |
python goodfet.bsl --comport=6 --speed=38400 --debug -e -p "../firmware/goodfet.hex" | Use in the client svn directory to Program the board with the compiled hex on COM7(change port to your situation). |
python goodfet.bsl -h | Show the help text for goodfet.bsl. Shows all possible arguments, etc. |
python goodfet.maxusbhid | Use in the client svn directory to emulate a HID Keyboard device. |
python -m serial.tools.list_ports | List all serial ports. Does not always work properly |